Before sending a solar panel inspection report to a client, you need to be comfortable with the panels behind the findings. Is the outline on the correct panel? Does the thermal pattern deserve a fault flag?
MapperTool Solar Inspect gives you a way to work through those questions. The module recognises panels automatically and flags suspected problems, then lets you inspect every panel and correct the results manually. When the review is complete, you can create a PDF report.
The following workflow concentrates on that review stage. It is useful for survey providers preparing a handover and for operators examining their own solar farms, particularly when the site is too large for an informal check of a few images.
1. Start with the survey context
Solar Inspect requires both a thermal orthomosaic and an RGB orthomosaic. Prepare the project using High processing and check that the two layers cover the same inspection area. The module is available to Pro subscribers only.
Open the maps at a useful scale and check the row ends, site edges and any sections captured across separate flight passes. Look for missing coverage or an offset between the thermal and RGB views. A problem in the underlying maps is worth resolving before you spend time correcting individual detections.
Keep the survey date and the operator's site layout at hand. If some sections were disconnected or shaded during capture, that information will help you interpret their appearance. A good review combines the thermal maps with what is known about the site.
2. Check that the detected outlines represent the panels
Solar Inspect's automatic recognition provides the initial panel detections. Review how those outlines sit on the RGB orthomosaic map before treating the result as a complete inventory of the surveyed area.
Start with a few straightforward rows to understand how the detections look, then examine areas where the imagery is less clear. Row ends, partial coverage and clutter around the array deserve particular attention. Work through the site in an agreed order so you can distinguish the sections already checked from those still to review.
When you find a problem, use the correction that fits it:
What you find | What to do in Solar Inspect |
|---|---|
A panel outline needs adjustment | Redraw the outline |
A detection does not represent a panel | Delete that detection |
A visible panel was missed | Add a new panel manually |
For example, if an outline cuts across the gap between two panels, redraw it to match the intended panel. If a real panel has no detection, add it so it can be included in your review. These corrections address what the software has identified as a panel, before you decide whether that panel should be marked faulty.

3. Examine the flagged panels individually
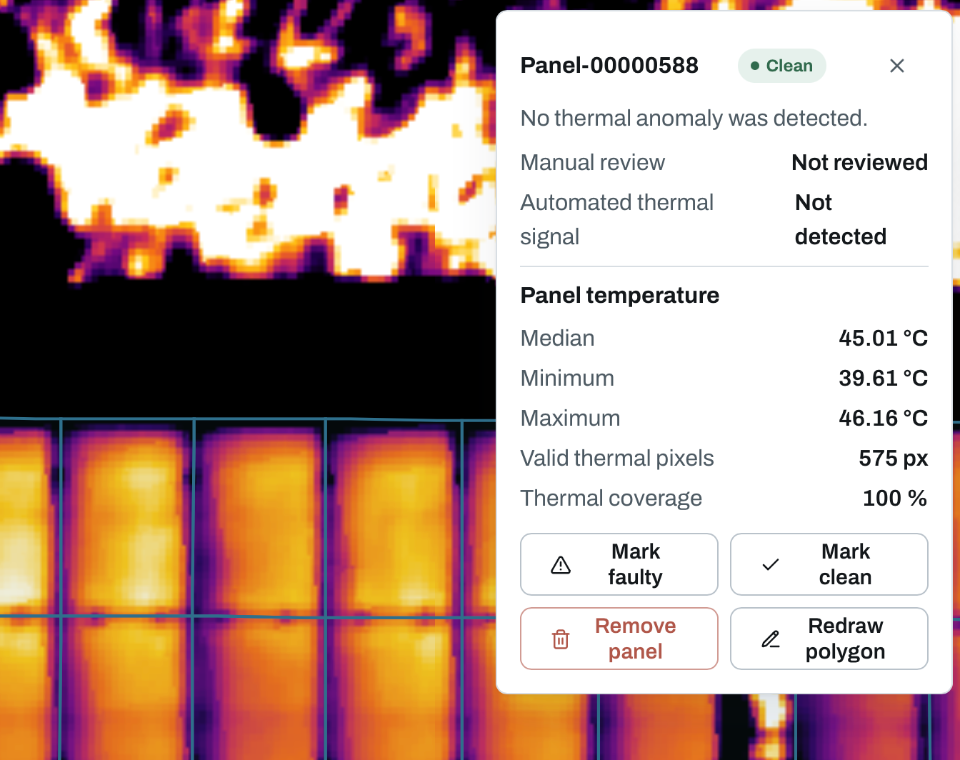
Solar Inspect flags suspected problems such as temperature outliers, cell faults and panel faults. Each panel can be examined separately, allowing you to check the finding against the available imagery.
Look at the shape and position of the thermal pattern, then use the RGB view for context. Is the affected area localised within the panel? Does it correspond to visible shading or soiling? Do nearby panels under similar conditions show the same behaviour?
An automatic flag is useful because it directs attention to a specific panel. The review adds the context needed to decide what to report. Thermal appearance alone does not establish every fault's cause.
In Solar Inspect, you can mark a panel as faulty or Clean. Use Clean when your review supports removing the fault indication. Treat that as the outcome of this inspection, rather than a guarantee of every aspect of the panel's electrical condition.
Also examine panels beyond the automatically flagged set. Manual review lets you mark a panel faulty when closer inspection reveals a concern that deserves inclusion. On a large site, establish a systematic review approach and record its scope in your accompanying survey notes.
4. Resolve uncertain findings before the handover
Consider an illustrative case: one panel stands out thermally, and the RGB map shows an object casting a shadow across it. You now have useful context, but you may still need a closer site inspection to explain the full pattern. The sensible follow-up depends on the evidence, not simply on how bright the panel looks in the palette.
For another panel, the image may be too coarse to separate a small feature from surrounding pixels. Retain that uncertainty in the explanation you send with the inspection. A higher processing setting cannot recreate detail missing from the original capture.
Keep any additional observations or proposed follow-up work in your survey notes. This is especially useful when the status can be decided in Solar Inspect but the explanation needs more detail for the person attending the site.
5. Prepare the solar panel inspection report
After completing the corrections and status checks, create the PDF report in Solar Inspect. Read through it before delivery and check that it represents the review you intended to hand over.
Alongside the generated PDF, make sure the client receives enough context to use the findings. Depending on the job, your accompanying survey notes should explain:
Which part of the solar farm was surveyed and when.
The relevant capture and operating conditions.
Any gaps or areas where interpretation was limited.
Which observations need further investigation on site.
Agree the accompanying information with the client, particularly where findings must be matched to their own asset references.
The PDF gives you a document to deliver, and Solar Inspect provides the individual panel view for closer examination in the software. Together, they support both the overview needed for the handover and the detail needed during review.
A repeatable way to review large sites
For a large solar farm, keep the order of work consistent, check the maps, inspect the detections, correct panel geometry, review the fault indications and then generate the report. This reduces the chance of spending time on an incorrect detection or overlooking a section of the site.
Solar Inspect supports that process with automatic panel recognition and fault flagging, alongside the manual controls needed to correct individual results. You can use the module for an extensive array without giving up the ability to examine a single panel closely.